Oct 30, 2026
Last Updated: 30 October 2026
Quick Summary
To scale 3d printed production, you must turn one-off parts into a documented, repeatable workflow with fixed stages for file control, build setup, post-processing and inspection. Design parts for the printing process, choose materials with intent, and control quality across every batch rather than inspecting only at the end.
Scaling 3D printed production is the shift from making one-off parts to running a repeatable process that delivers the same result every time. The first part is easy; the hundredth is where the work begins.
Three things change at once:
The core challenge is process discipline. A peer-reviewed study on 3D printing manufacturing challenges published in Heliyon (2020) examined the hurdles biomedical manufacturers face when moving additive processes into production, and process control sits at the centre of them.
Below, we break down exactly how to scale 3D printed production without losing accuracy, speed, or margin.
A repeatable 3D printing production workflow is a documented sequence of steps that produces identical parts across every run. It removes guesswork from the operator and puts it into the process.
Start with four fixed stages:
The mistake we see most often is treating each order as a fresh project. That works at ten parts. At a thousand, it collapses.
Document the workflow once, then train to it. Contact 76 ADDITIVE to discuss how batch manufacturing can fit around a workflow like this.
Bridge manufacturing for electronics design is the practice of producing saleable quantities with additive manufacturing while hard tooling is prepared. It lets you ship product, gather field data, and refine the design before committing to injection moulding.
For electronics enclosures, brackets, and housings, this changes the risk profile:
The catch is design discipline. For a deeper look at this stage in a specific sector, read our guide to bridge manufacturing for automotive parts. A bridge part must be designed for the final process, not just for printing. Wall thickness, draft, and fixing points should already suit moulding so the transition is clean.
Design for additive manufacturing is the process of shaping parts around how printing actually works, so you avoid fixes later. Most bottlenecks at scale trace back to a design decision made months earlier.
Watch for these:
A common mistake is designing for the printer instead of the assembly. The part prints beautifully and then won't fit.
At 76 ADDITIVE, our end-to-end design support exists to catch these before a batch is committed. It is far cheaper to redraw a file than to scrap a run.
Process and material choice decides your output ceiling. Two parts can look identical and behave completely differently depending on how they were made.
For higher volumes, 76 ADDITIVE uses state-of-the-art MJF and Carbon DLS 3D printing technology. MJF suits durable, repeatable end-use parts. Carbon DLS suits fine detail and smooth surfaces.
The right material pick depends on how the part is loaded in service, and 76 ADDITIVE can advise on the options suited to your part.
Decision | Choose this | Best for |
|---|---|---|
High impact, flex | Nylon PA11 | Clips, guards, living hinges |
Stiff, accurate | Nylon PA12 | Housings, brackets, fixtures |
Fine detail, smooth finish | Carbon DLS | Consumer-facing parts |
Dense batch output | MJF | Repeat runs of durable parts |
Contact 76 ADDITIVE to see which material suits your part.
Additive manufacturing quality control is the set of checks that prove each batch meets specification. At scale, it is the difference between a supplier and a liability.
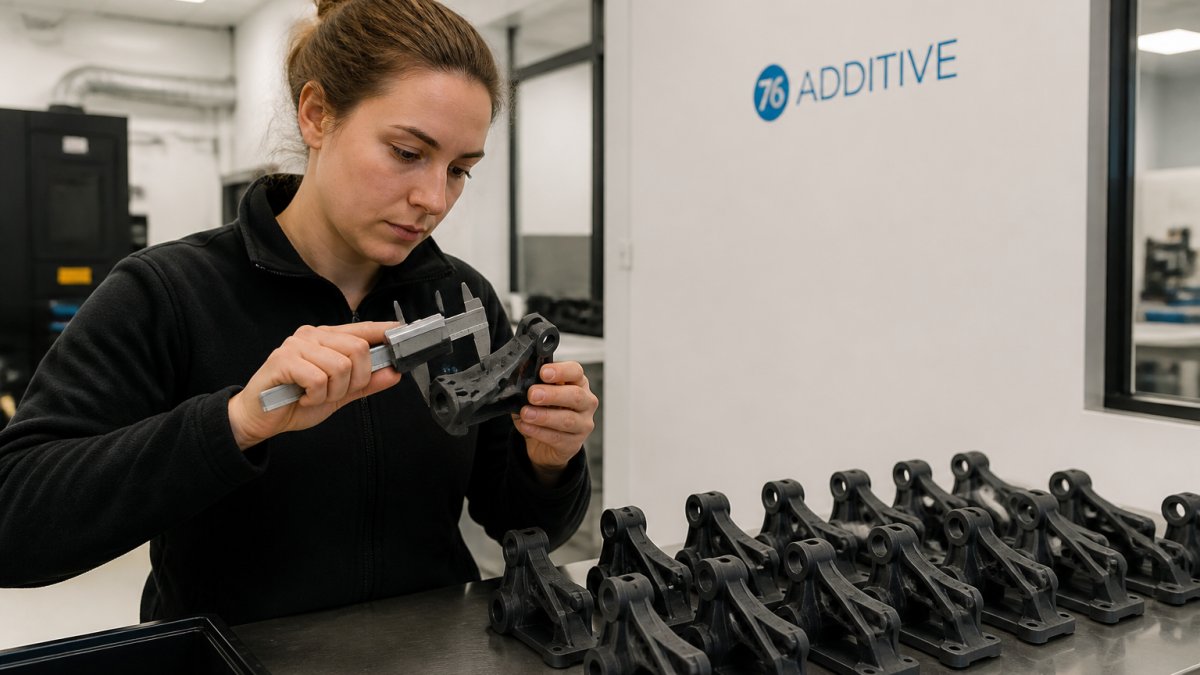
Build these into every run:
The thing nobody tells you about scaling: quality failures rarely come from the printer. They come from undocumented changes. A tweaked file, a different nest, a new operator. Control the change, control the quality. Our case studies show how quality and repeatability are achieved across production batches.
Most scaling problems are predictable. Here are the ones we see repeatedly:
Watch out: committing to a large run before proving the geometry is the single most expensive mistake in additive production. Prove it small first.
Scaling 3D printed production comes down to process, not luck. Fix your workflow, design for the process, choose materials with intent, and control quality across every batch.
That is what we do at 76 ADDITIVE. With 17 years in design and manufacturing, 76 ADDITIVE runs MJF and Carbon DLS production with no tooling investment, direct operator communication, and fast turnaround on repeatable end-use parts. We produce components for UK cycling brands, and our in-house brand is 76 Projects.
If you are looking for on-demand 3D print manufacturing in Ely, Cambridgeshire, our team can advise on the right route for your volumes.
Consistency comes from controlling the variables that affect every part: machine calibration, material batch, build orientation and post-processing. Write these into a documented 3D printing production workflow so each run follows the same settings. Track dimensional results with a sampling plan rather than checking every part by eye. When a batch drifts outside tolerance, pause and correct the process before continuing. This approach keeps 3D printed production repeatable as volumes rise, and it gives you evidence to show customers that parts meet specification.
The switch usually depends on volume, geometry and material needs rather than a fixed number. Injection moulding carries high tooling costs that only pay back at higher quantities, so low and mid-size runs often stay cheaper with additive manufacturing. If your annual volume is still in the hundreds or low thousands, and your design may change, 3D printing avoids tying up capital in tooling. Review the decision each time volumes grow or the design stabilises, and compare total cost including tooling, lead time and revision risk.
Bridge manufacturing uses additive processes to produce end-use parts while you prepare for mass production. It fills the gap between prototype and full-scale manufacture, letting you launch a product, gather customer feedback and refine the design before committing to tooling. For electronics projects, bridge manufacturing for electronics design covers enclosures, mounts and internal fixtures made in low volumes. It reduces the risk of expensive mould changes and shortens the path to market, particularly when demand is uncertain or the design is still evolving.
Start with a defined specification covering dimensions, surface finish and mechanical performance. Use calibrated measuring tools to check critical features against that specification, and record results for each batch so trends are visible. Add visual inspection for layer defects, warping and incomplete fusion. Where function matters, include fit tests or destructive samples from the same build. Documented additive manufacturing quality control means every batch can be traced back to its machine, material and settings, which makes problems easier to isolate and fix.
Ready to move from prototype to production? Get started with 76 ADDITIVE and contact us to request an instant quote for your next batch.
Opening Hours (our printers run through the night)
Monday - Friday, 9am - 5pm


76 Additive
19 Hall Barn Road Industrial Estate
Isleham, Ely
Cambridgeshire, CB7 5RJ
76 Projects t/a 76 Additive
Registered in England & Wales Company no: 10235633
VAT: 245 830 796